After assembling the individual modules (see Building your own Laser4DIY device), it is now time to integrate all modules into the enclosure.
Mechanical Setup
The enclosure should already include the safety circuit, mounted on DIN rails. On these DIN rails there is space left to mount the electronics components:
- the TEC Controller
- the laser diode driver
- and the Nucleo board carrying the CNC shield for the XY table.
To mount the components on the DIN rail, we use Wago clips (see BOM below) attached to the heat spreader of the TEC controller and the laser diode. For the nucleo board we use a custom 3D printed clip, which you can find in our enclosure repository https://github.com/Laser4DIY/Laser4DIY_Enclosure/tree/main/3dprinting/DIN-Rail-PCB-Clip
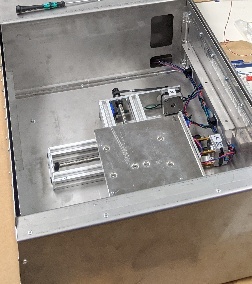
The XY table is mounted in the enclosure using 4 M4 screws. They are inserted from below through holes in the bottom of the enclosure. They reach into V-nuts inserted in the bottom aluminum profiles. For the correct orientation and position see the following images.
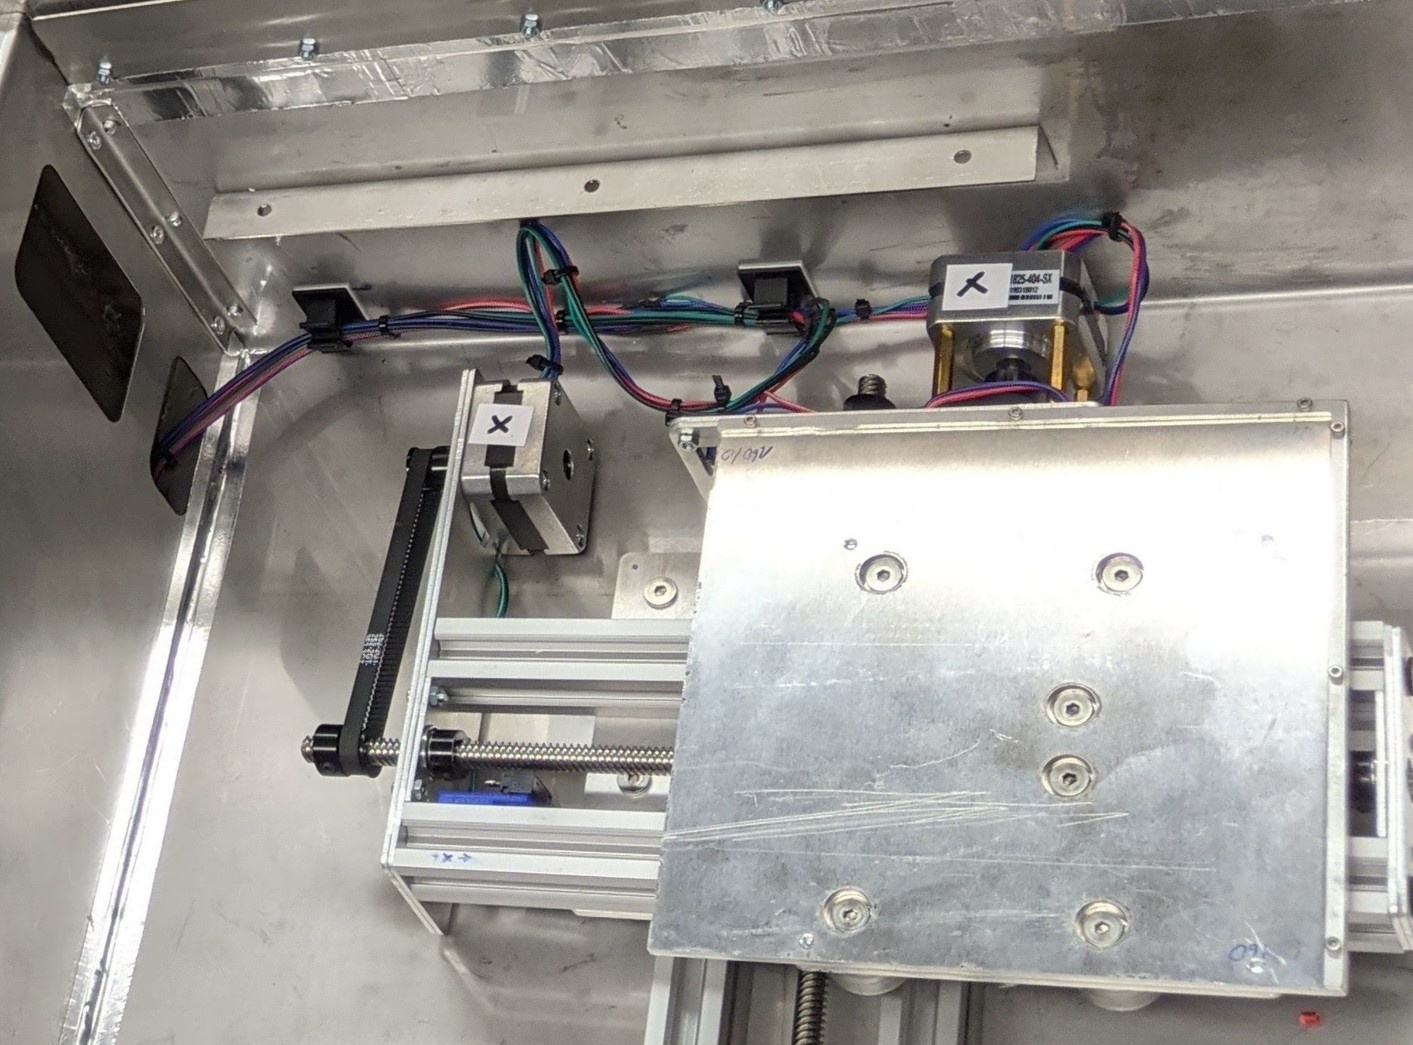
Make sure the table can travel freely in both directions.
Back Plate
On the backside of the enclosure there is an opening intended for inserting a mounting plate for all inlets and connectors. The plate is made from 1mm stainless steel, it's part of the enclosure repository: backplate.dxf in /lasercut/1mm_steel/enclosure folder.
This plate holds the following:
- 2 Quicklock sockets for the cables coming from the supply unit
- Water in- and outlet for the water cooling (coming from/going to the supply unit as well)
- USB B socket for connecting a laptop/PC. The used socket has an USB A socket on the inside, where a small USB HUB is plugged in (see wiring diagram below)
- connector for fume extraction
The backplate is mounted with 4 M3 screws and lock nuts. For details on the used socket/connector components see BOM and chapters electrical setup, water cooling and fume extraction.
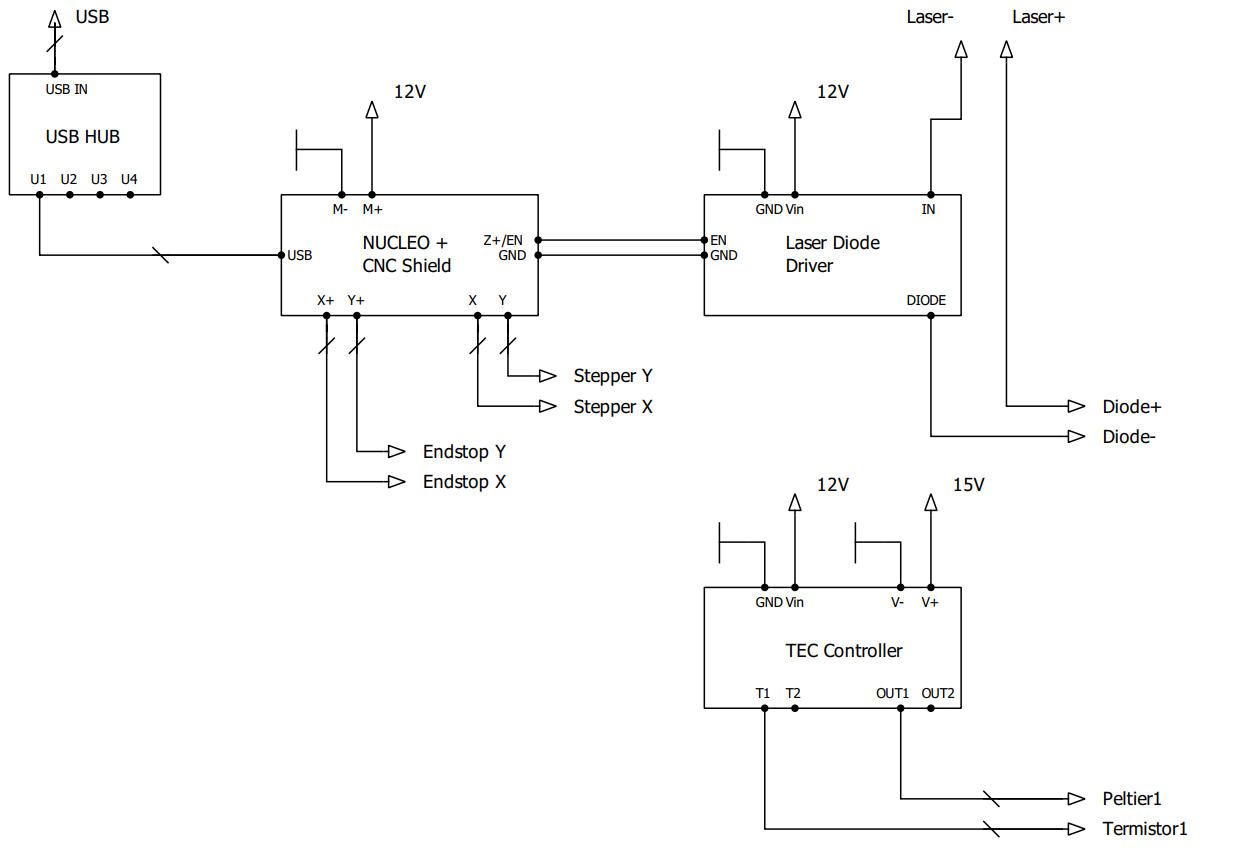
Electrical setup
These components need to be wired up following this diagram:
Fume extraction
The device is prepared for attaching an external fume extraction system. We are recommending one with a 2- or 3-stage filter system including activated coal. We are using a BOFA V250. For attaching its flexible spiral coiled tube (ca 58mm diameter), we have designed a 3D printed part that is mounted in the back plate:
If you are using the same fume extraction system or one with a compatible flexible tube, you can simple 3d print the STL file in the repository. For other tubes, you have to adapt it or modify the part. We have included the source CAD file (Fusion360) and a STEP file of the part for this purpose (check the CAD folder in the repository)
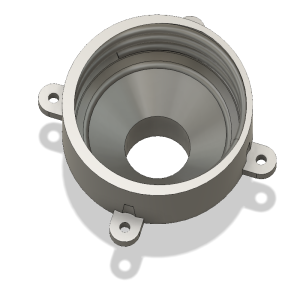
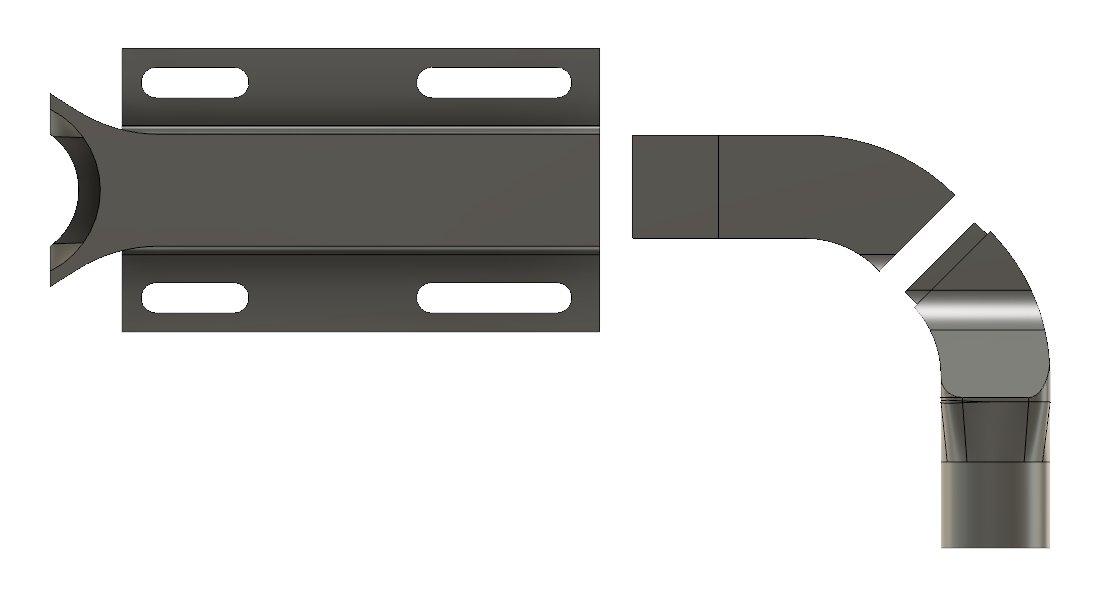
The ablation process is taking place on the XY table, just below the hole optical bread board. For good fume extraction performance, there is a custom extraction funnel:

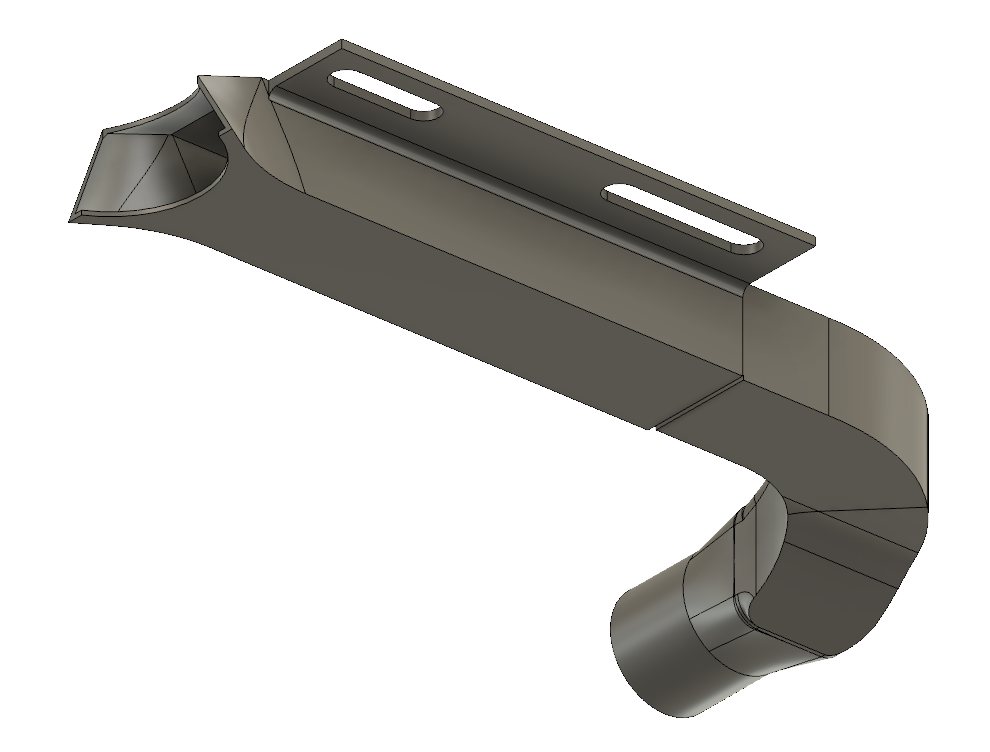
Again, this is 3D printed. For support-free printing on an FDM 3D printer this is printed as 3 parts, which are then simply plugged together. For better stability, add a bit of glue.
The assembled part is then mounted on the underside of the optical bread board. Use short M5 screws using the slots in the funnel piece, which allow for adjustment.
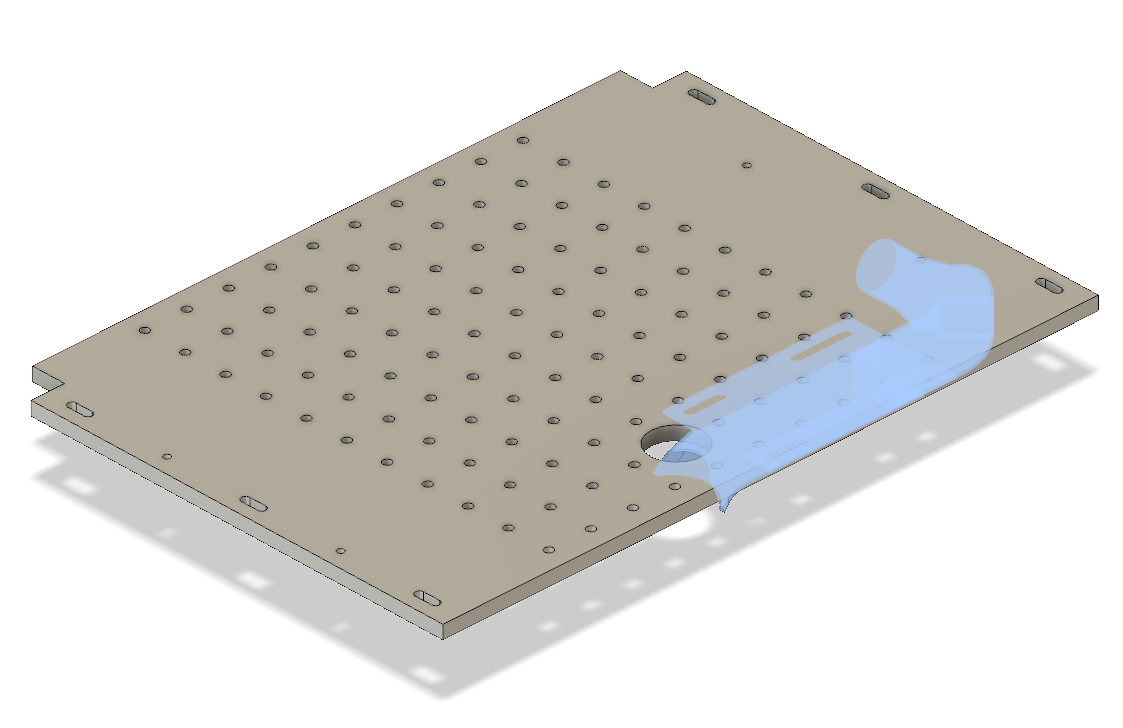
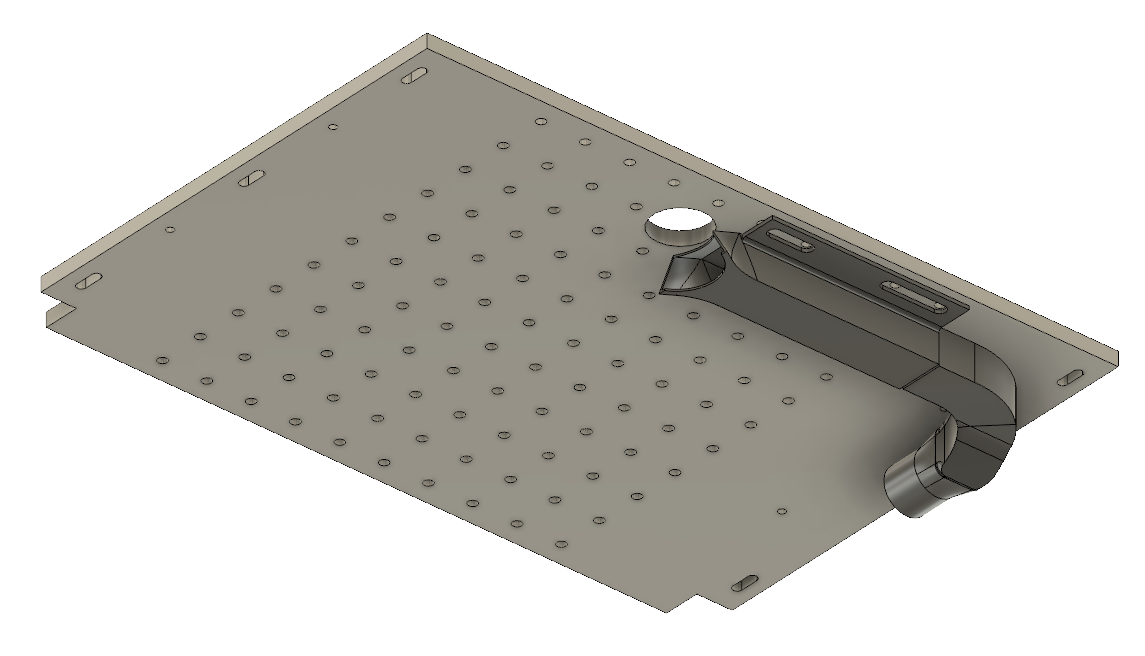
The funnel is connected to the extractor port using a spiral coiled flexible tube with an inner diameter of 1 inch (25.4mm). This flexible tube can simply push on the endings of the funnel and the inner part of the extractor port.
Water Cooling
The tubes for water cooling coming from the supply unit have an outer diameter of 12mm. At the laser source we are using 8mm tubes. We are connecting these the following way:

In the backplate there are 12mm bulkhead union pieces. Inside the enclosure we are continuing with a short 12mm tube (ca 15cm) plugged into a 12mm to 10mm reducer. An reducing Y-adapter then allows the 8mm tubes to be plugged in.
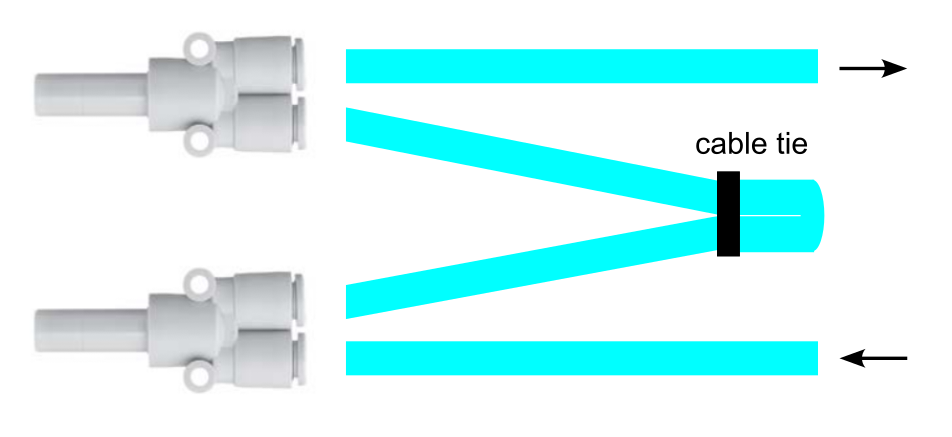
The water cooling system is prepared for 2 separate 8mm cooling tubes. However in the current state without optical amplifier, only one line is needed. To close off the other line, with "short cut" it with a small piece of tube, with is kinked and secured with a cable tie, like this:
Again, for details on the used parts, refer to the BOM below.
BOM
| Qty | Part name | Manufacturer Part | Part Link | Comments |
|---|---|---|---|---|
| Electrical Components | also see Laser4DIY Enclosure Assembly | |||
| 1 | Front panel mounting USB type B | PX0842/B | reichelt | |
| 1 | Mini USB hub | DIGITUS DA-70217 | ||
| 1 | USB cable A to micro B, 30cm | GOOBAY 95735 | ||
| 4 | DIN rail snap in mounting | WAGO 209-123 | ||
| 2 | OLED display | DM-OLED154-6391.54" 128 X 64 | data sheet | |
| Water Cooling Components | ||||
| 1 | PU tube 12x8 | SMC TU1208BU | 2 short pieces, ca 15cm each | |
| 1 | PU tube 8x5 | SMC TU0805B-20 | 2m | |
| 2 | Fitting, bulkhead union 2x 12mm | SMC KQ2E12-00A | ||
| 2 | reducer 12 to 10mm | SMC KQ2H10-12A | ||
| 2 | reducing Y piece 10mm to 2x 8mm | SMC KQ2X08-10A | ||
| Fume extraction | ||||
| 1 | Fume extraction system, e.g. BOFA V250 | |||
| 1 | Flexible spiral coiled tubing, 1 inch inner diameter | amazon | 1m |